Overview
This article provides a comprehensive guide for the initial setup of your LGF Cloud Portal instance. It covers crucial prerequisites like DNS configuration, the process for your first login using default credentials, and the essential steps to configure an authentication provider (OIDC or SAML) and role-based access control (RBAC).
Prerequisites: DNS and Firewall Configuration
Before you begin with the Cloud Portal software setup, it is critical to ensure that your network infrastructure is correctly configured. The Cloud Portal requires proper DNS resolution and accessible firewall rules to function correctly.
m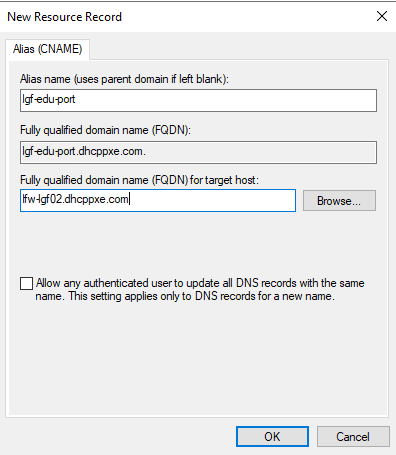
_Figure: Example of creating a CNAME record in Windows DNS Manager._
- Internal DNS Entry: Create an internal DNS entry (e.g., a CNAME record as shown above) that points to the Cloud Portal instance. This allows internal clients and services to resolve the portal's address.
- External DNS Entry: If your Cloud Portal will be accessible from the internet, create a corresponding external DNS record (A record or CNAME) pointing to the public IP address of your Cloud Portal instance.
- Firewall Rules: Update your external firewall rules to allow inbound traffic on the necessary ports (typically HTTP/HTTPS - 80/443) to reach your Cloud Portal instance. Ensure any internal firewalls also permit communication as required.
First-Time Login
Upon initial deployment, the Cloud Portal will present a login screen. As part of the bootstrap process, a temporary administrator account is created to facilitate the initial configuration.
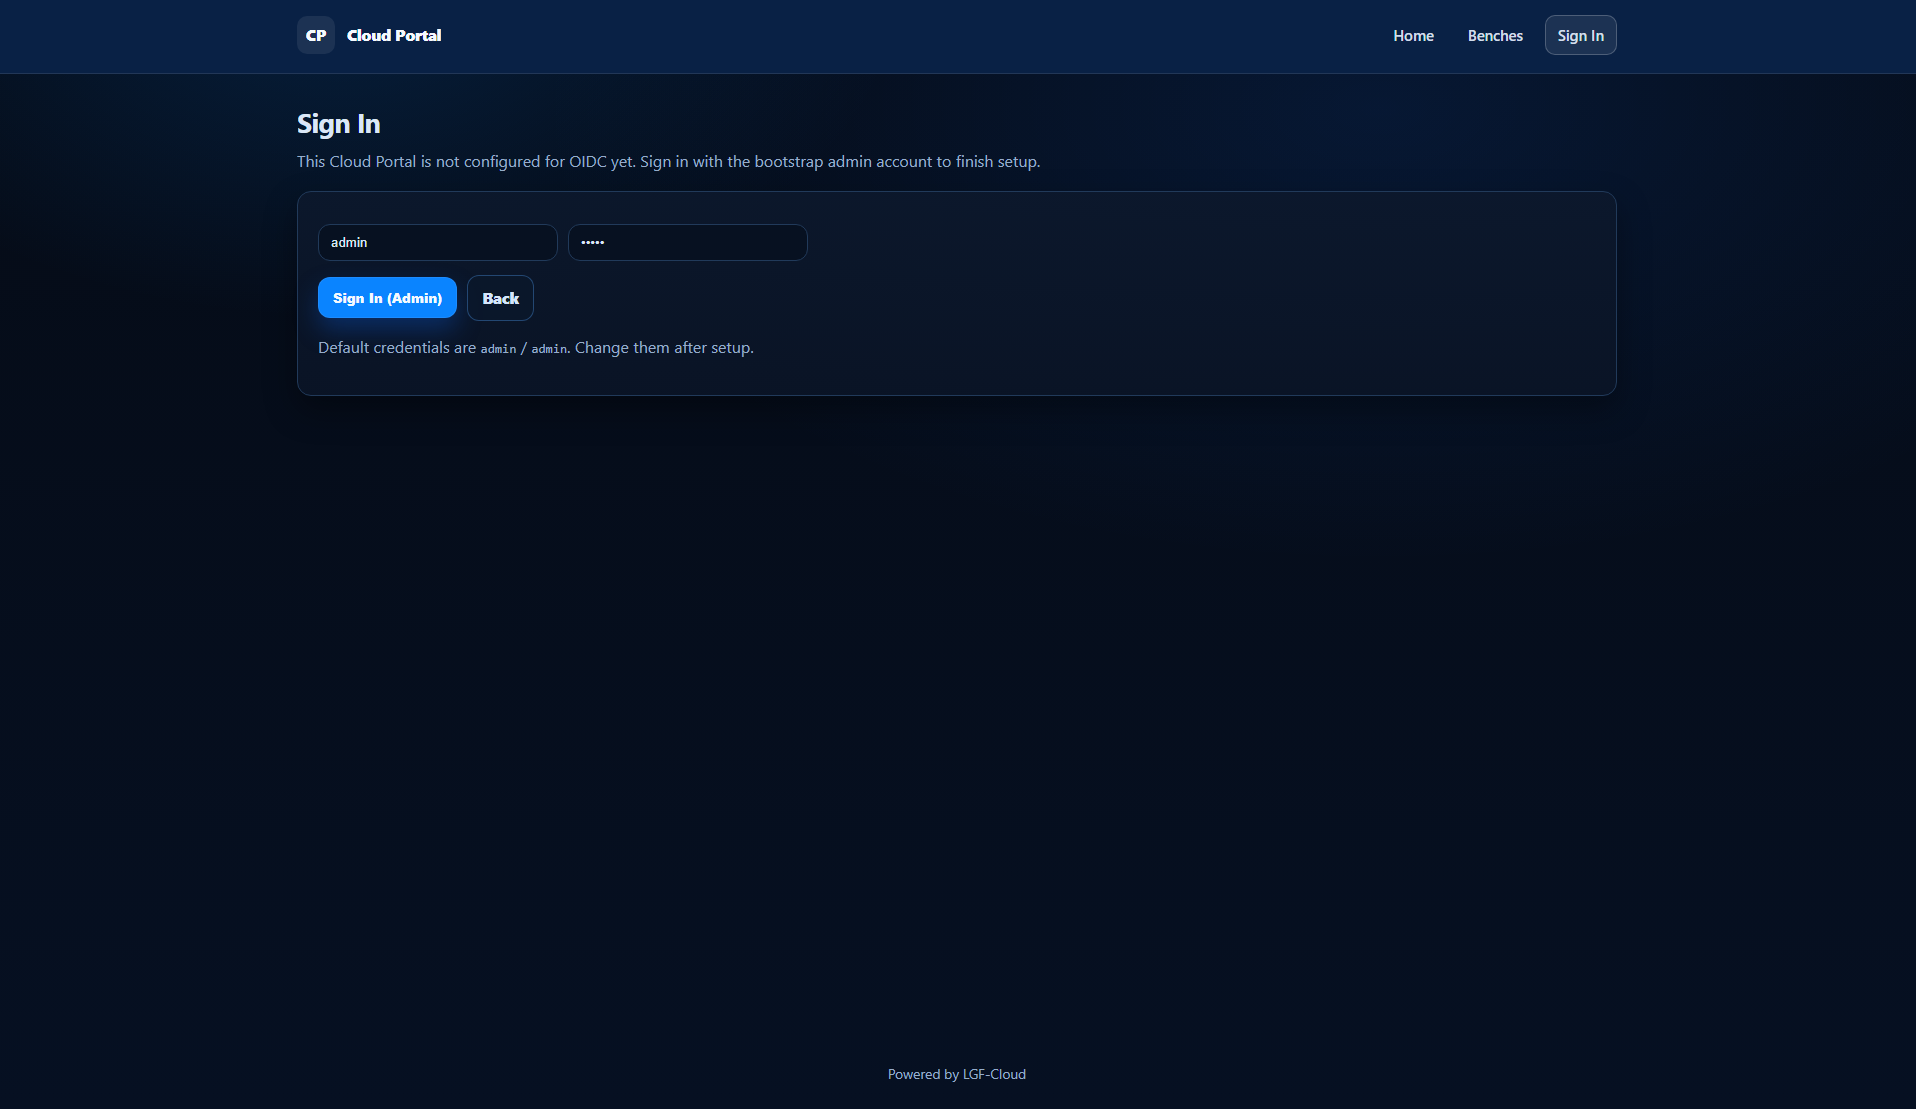
_Figure: The standard login interface for the LGF Operator Console._
- Navigate to the URL of your LGF Cloud Portal (e.g.,
https://your-cloud-portal.example.com). - You will be presented with a login screen.
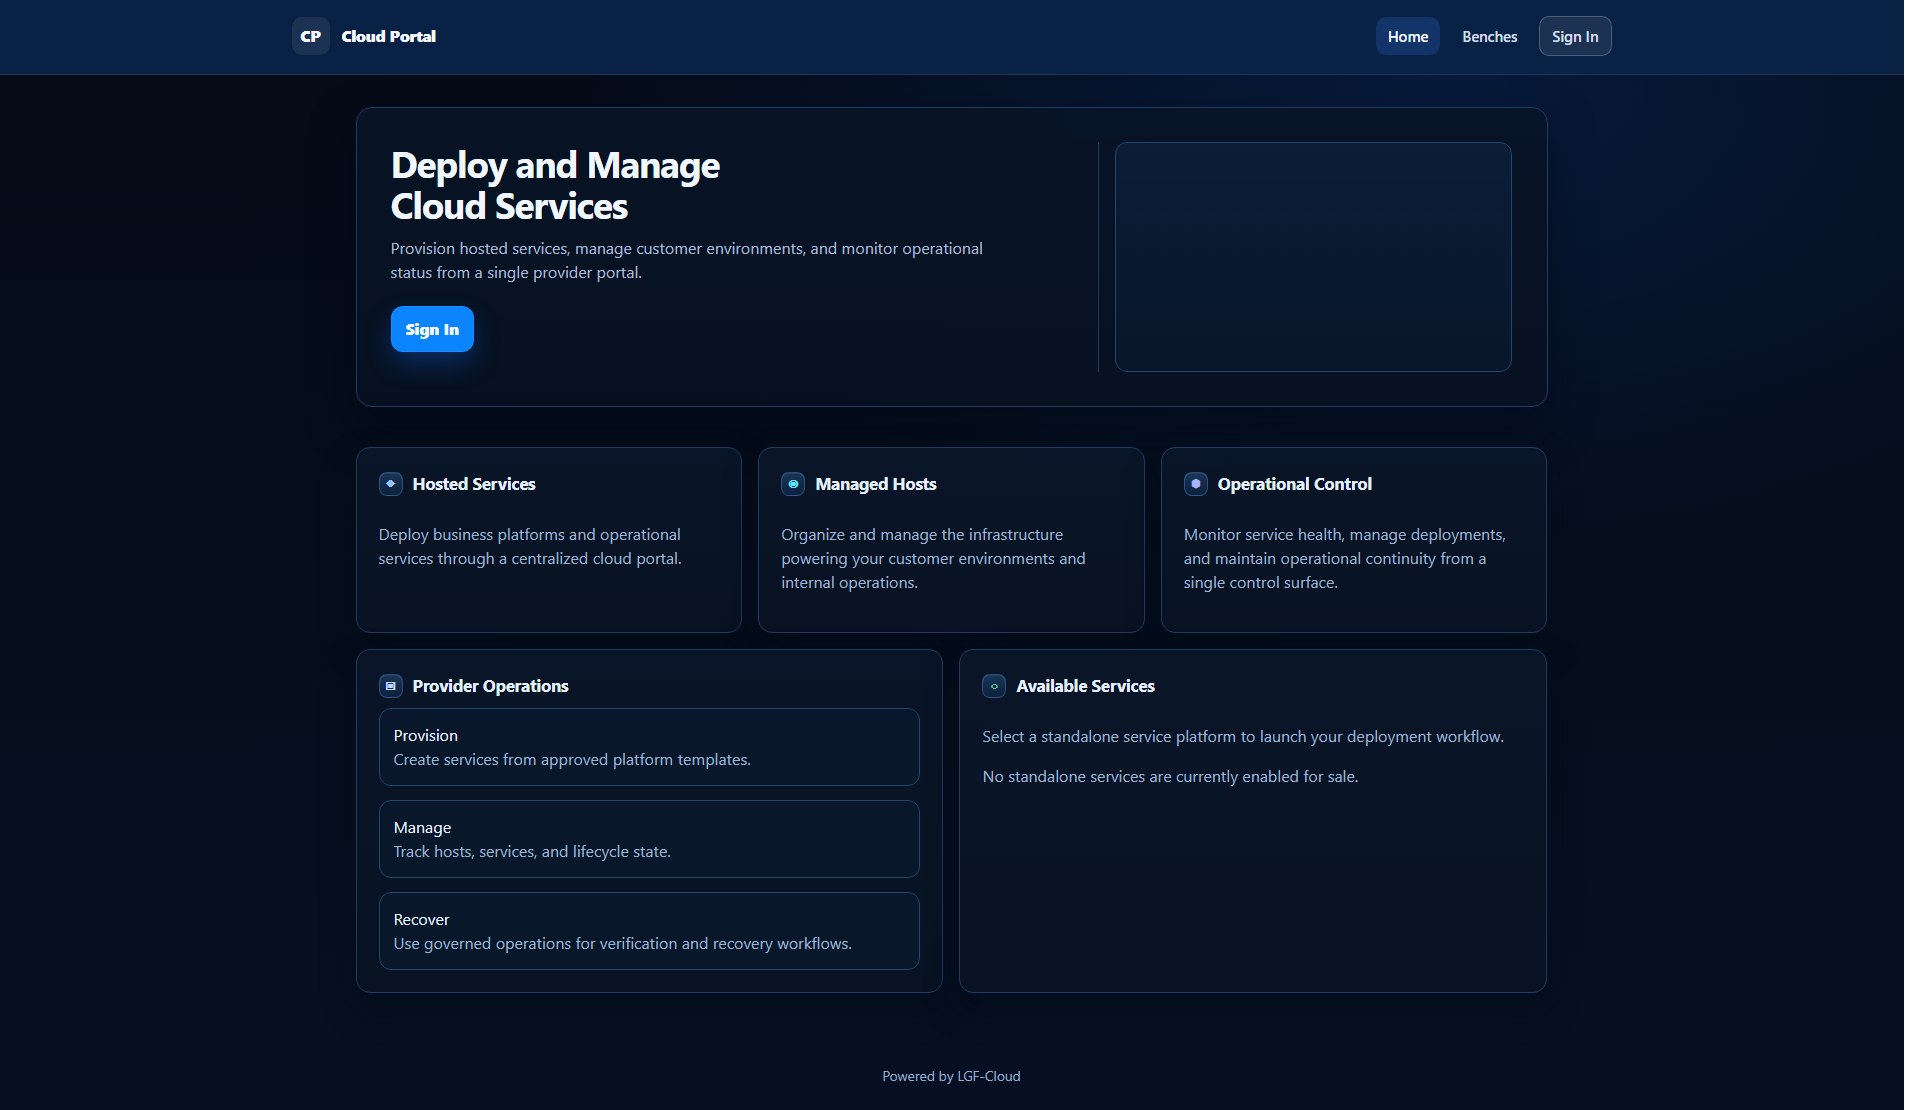
_Figure: Signing in with the bootstrap admin account to complete setup._
- Use the default bootstrap credentials:
- Username:
admin - Password:
admin
- Click Sign In (Admin).
Upon successful login, you will typically be directed to the main Cloud Portal dashboard, which might appear sparse initially as no services or hosts are yet configured.

_Figure: The Cloud Portal dashboard immediately after the first successful login._
Essential: Authentication Provider Setup
For security and proper user management, configuring an external authentication provider is required before the Cloud Portal can be used effectively for production environments. The Cloud Portal supports OIDC (OpenID Connect) and SAML-based identity providers. This guide illustrates setup using Keycloak (OIDC).
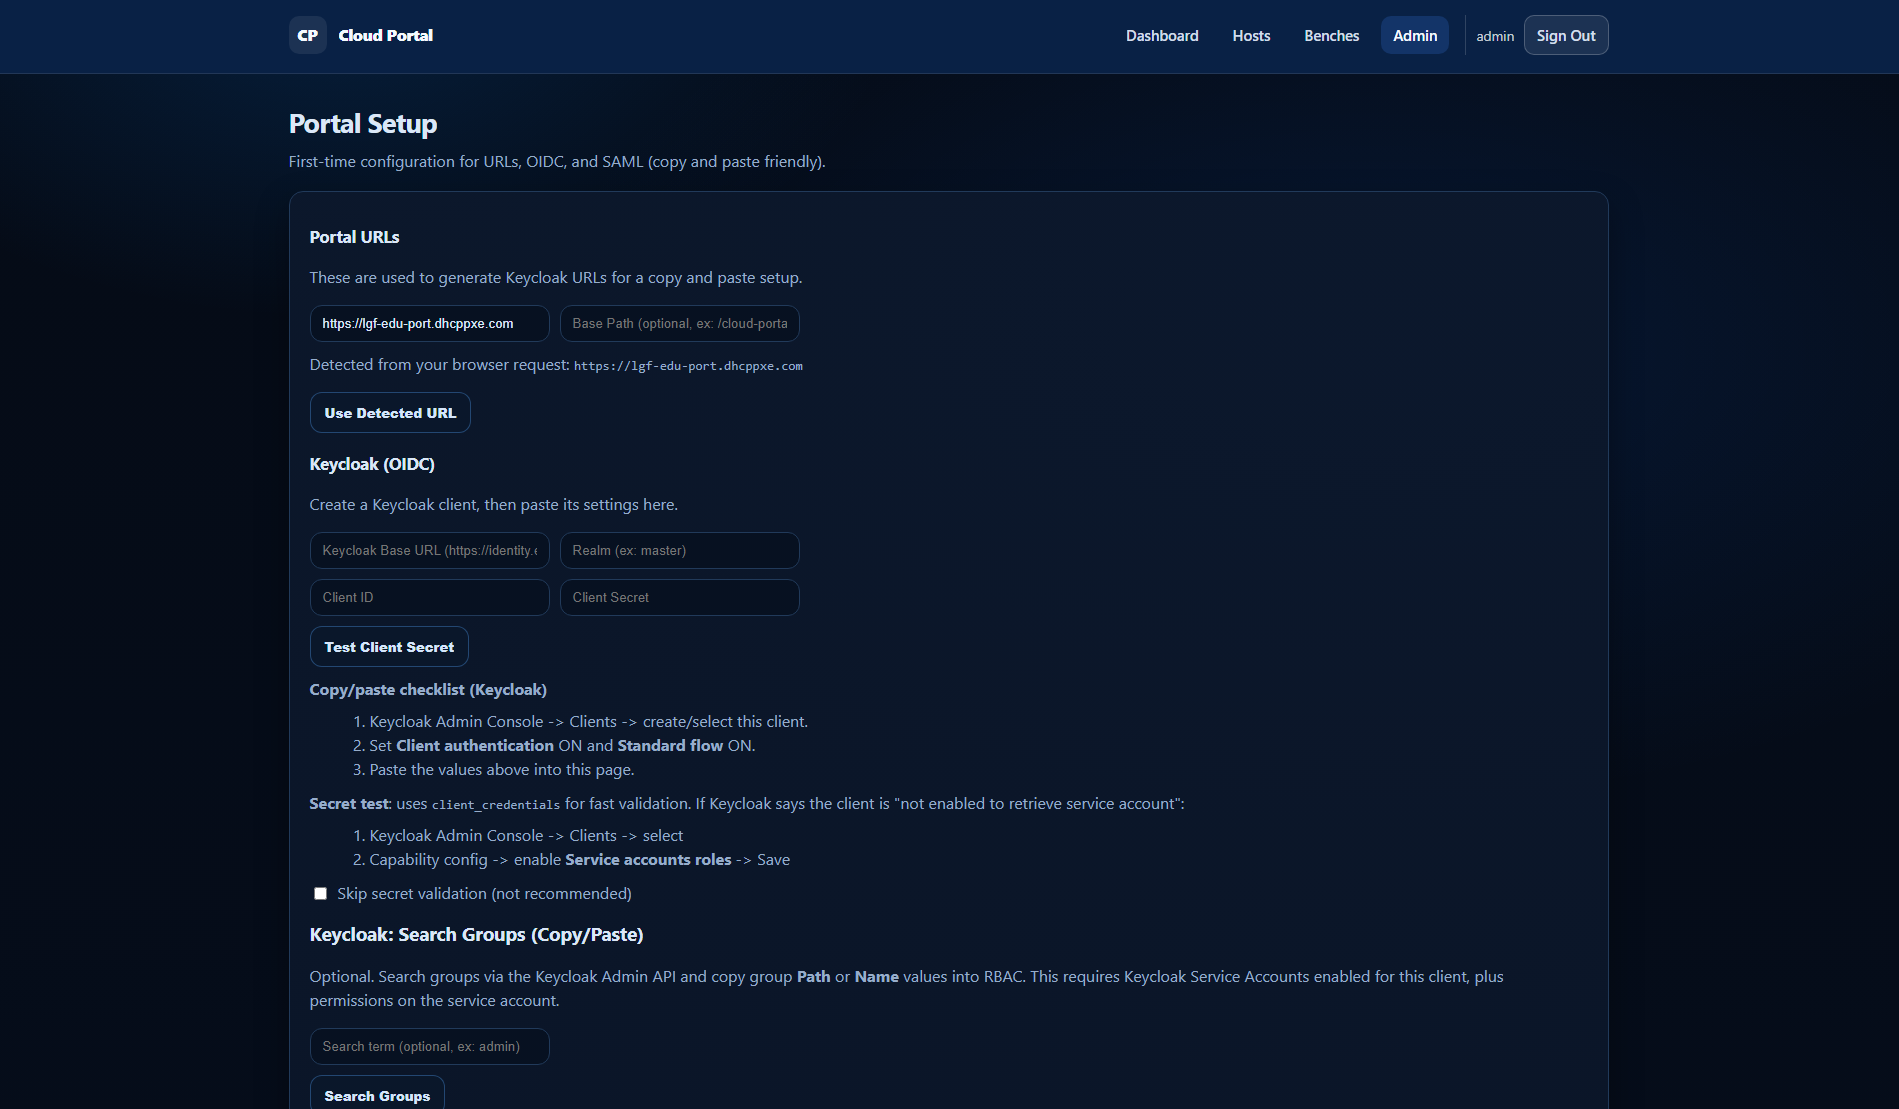
_Figure: The Portal Setup page for configuring authentication providers._
- After logging in as
admin, navigate to the Admin section (typically found in the top navigation bar). - Select Portal Setup or similar to access the authentication configuration page.
- Portal URLs: Review the detected Portal URLs. These are used by your identity provider (e.g., Keycloak) for callback and redirect URIs. Ensure these are correct.
- Configure your OIDC/SAML Provider:
- For Keycloak (OIDC), you will need to:
- Obtain your Keycloak Base URL, Realm, Client ID, and Client Secret from your Keycloak instance.
- Paste these values into the corresponding fields in the Cloud Portal.
- Use the "Copy/paste checklist" provided on the page to ensure your Keycloak client is correctly configured (e.g.,
Client authentication ON,Standard flow ON,Service accounts roles ON). - Click Test Client Secret to verify the connection.
- Keycloak: Search Groups (Copy/Paste) for RBAC:
- This section allows you to configure Role-Based Access Control by mapping groups from your Keycloak instance to roles within the Cloud Portal (e.g.,
customers,admins). - Use the Keycloak Admin API to identify the group
PathorNamevalues you wish to use. - Paste these values into the Cloud Portal configuration.
- Ensure that Keycloak Service Accounts are enabled for the client if you are using group searching.
- Click Save or Update to apply your authentication settings.
Verification
After configuring your authentication provider:
- Log out of the
adminbootstrap account. - Attempt to log in using credentials from your newly configured identity provider.
- Verify that you can successfully authenticate and access the Cloud Portal dashboard with the appropriate permissions based on your RBAC configuration.
Next Steps
Once the initial setup and authentication are complete, you can proceed to:
- Managing Cloud Portal Hosts to register and manage your platform hosts.
- Deploying services and managing your environments.