Overview
This article explains how to configure DNS automation in the LGF Cloud Portal. By integrating a supported DNS provider, the portal can automatically create and manage DNS records for every new bench, and subsequently clean them up when a bench is cancelled. This simplifies the deployment process by eliminating the need for manual DNS entry.
The LGF Cloud Portal supports the following DNS integration providers:
- DNSExit
- CloudFlare
Prerequisites
- Administrative access to the LGF Cloud Portal.
- An active account with a supported DNS provider (DNSExit or CloudFlare).
- API Key (for DNSExit) or API Token (for CloudFlare) from your DNS provider.
Steps
1. Configure the DNS Provider
The first step is to enter your DNS provider's API credentials into the Cloud Portal.
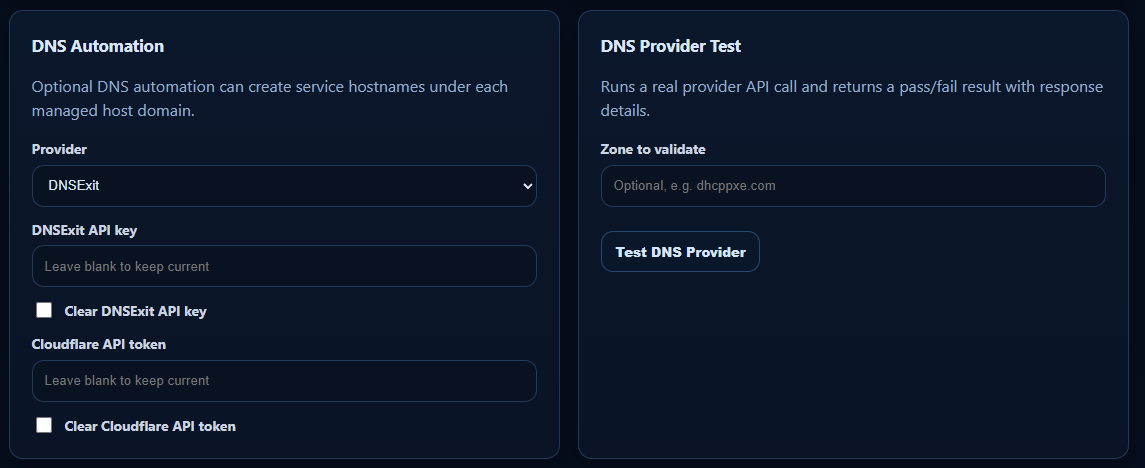
_Figure: The DNS Automation panel for selecting a provider and entering API credentials._
- Log in to the Cloud Portal as an administrator.
- Navigate to the Settings or Administration area.
- Locate the DNS Automation panel.
- Select your Provider from the dropdown list (either DNSExit or CloudFlare).
- Enter the appropriate API credential:
- For DNSExit, fill in the DNSExit API key.
- For CloudFlare, fill in the Cloudflare API token.
- The credential fields are write-only. To update a key or token, simply enter the new one.
- Click Save.
2. Test the DNS Provider Integration
After saving your credentials, it is important to test the integration to ensure it is working correctly.
- In the DNS Provider Test panel, enter a Zone to validate. This should be a domain name that is managed by your configured DNS provider account.
- Click Test DNS Provider.
- The portal will run a live API call and return a pass/fail result with response details. A "pass" result confirms the integration is working.
3. Automated Hostname Assignment
Once DNS automation is enabled, the bench provisioning process will automatically suggest and create hostnames for new benches.
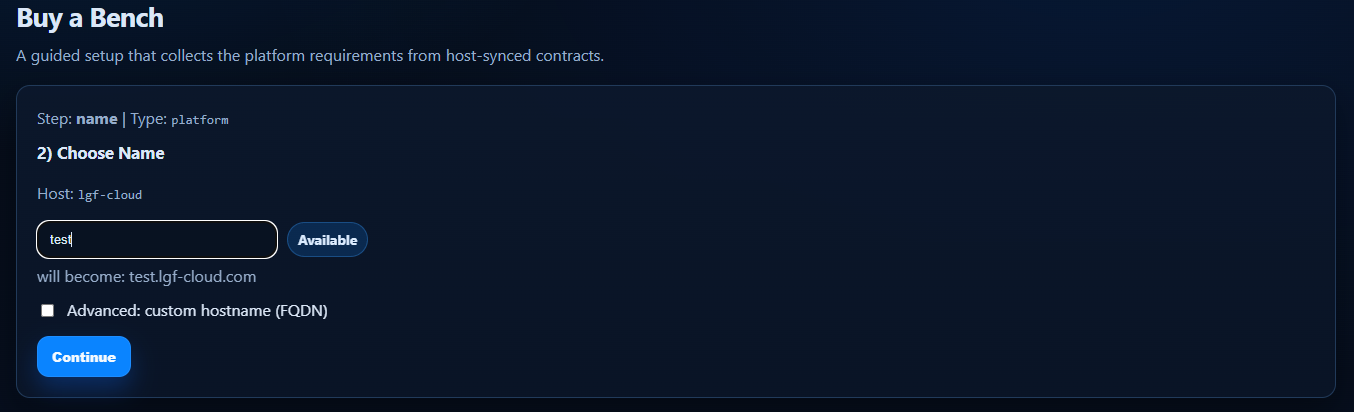
_Figure: A new bench name being validated for DNS availability during the provisioning process._
During the "Buy a Bench" workflow, the user will be prompted to choose a name. The portal will check if the corresponding hostname is available in DNS and, upon successful bench creation, will automatically create the required DNS records.
Verification
- The DNS Provider Test returns a "pass" result.
- When provisioning a new bench, a hostname is automatically suggested and created.
- When a bench is cancelled or de-provisioned, the associated DNS records are automatically removed from your DNS provider.
Troubleshooting
DNS Provider Test Fails
- Cause: The API key or token is incorrect, has insufficient permissions, or the zone is not managed by the account.
- Fix: Verify the API credential is correct and has the necessary permissions to read and write DNS records for the specified zone. Confirm the test zone exists in your provider account.
Hostname not created automatically
- Cause: DNS automation may not be enabled or the test may have failed.
- Fix: Ensure that the DNS provider is configured correctly and that the integration test passes. Check the portal's logs for any errors during the provisioning process.